Define the Restore Options
After you specify a recovery point and content to restore, define the copy options for the selected recovery point.
Follow these steps:
- From the Restore Options dialog, select the restore destination.
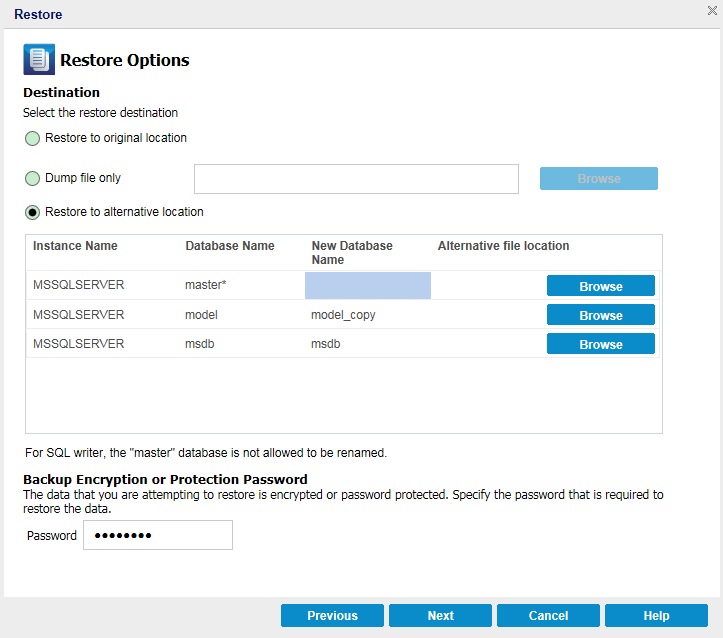
- Select the destination for the restore.
- The available options are to restore to the original location of the backup, restore the dump file only, or restore to alternative location.
- Click Next.
- The Restore Summary dialog opens.
Restore to original location
Restores to the original location from where the backup image was captured.
Dump file only
For this option, Arcserve UDP Agent (Windows) dumps the selected Microsoft SQL database files to the specified folder. When you select this option, you can then specify or browse to the folder location where the dump file will be restored to.

Restore to alternate location
Restores to an alternate location (not the original location).

Backups can be copied to network locations and they can be used by multiple SQL Server instances. You can perform a multiple database restore (simultaneously) from the instance level. From this listing, you can select the database instance and specify a new database name and alternate location to restore the database to. In addition, you can also browse to the alternate location where the database will be restored to.
When restoring a Microsoft SQL Server application to an alternate location, there are some considerations that you should be aware of. For more information, see the Microsoft SQL Server Restore to Alternate Location Considerations section in the topic Review the Restore Prerequisites and Considerations.